Thursday, March 24, 2011
Springtime Headband
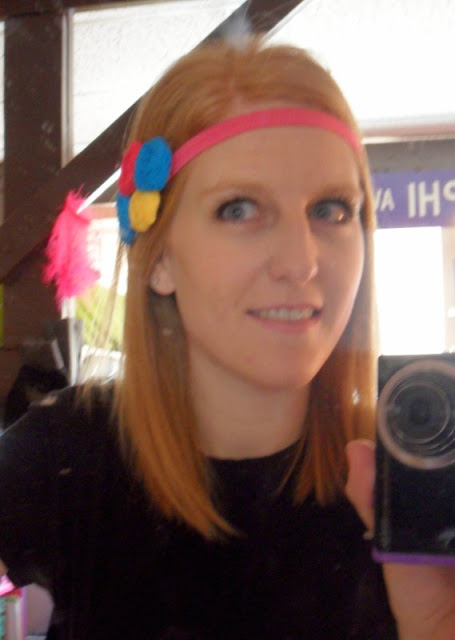
In an attempt to use up some more of my rolled roses, I made a headband with some springtime colors.
The headband is separate from the flowers...which are on a clip, so I can switch it out if I want. Those colors make me wish it was warmer outside...summer come soon!

Wednesday, March 23, 2011
Rolled Roses Tutorial
So I know there might be other tutorials out there on this, but I had a request for one, and I kind of just made it up the first time I did it anyway...so here is mine.
::Supplies::
-fabric scissors or rotary cutter
-fabric
-hot glue gun (loaded)
Cut a strip of fabric, the longer the strip the bigger the rose. (Mine for this was 22" x 1.5" but it doesn't need to be perfect).
Some people prefer to use fabric glue, but I feel as though hot glue dries more quickly, so I prefer it.
Use these to dress up a hair clip, brooch, anything you can think of...click here and here for a sample of what I've used them for.
I hope that wasn't too confusing. Let me know if you have any questions!
Linking up here:


::Supplies::
-fabric scissors or rotary cutter
-fabric
-hot glue gun (loaded)
Cut a strip of fabric, the longer the strip the bigger the rose. (Mine for this was 22" x 1.5" but it doesn't need to be perfect).
Fold the fabric in half
Tie a knot
Start to roll the fabric.
Add a dab of hot glue ever turn or two.
Keep twisting the fabric and adding glue. (This is a fairly hot-glue heavy project).
Leave a little bit at the end.
Cover it in hot glue.
Glue to the bottom of the rose.
And you're finished!
Some people prefer to use fabric glue, but I feel as though hot glue dries more quickly, so I prefer it.
Use these to dress up a hair clip, brooch, anything you can think of...click here and here for a sample of what I've used them for.
I hope that wasn't too confusing. Let me know if you have any questions!
Linking up here:


Tuesday, March 22, 2011
Five-Minute Pincushion
This weekend was full of homework...I just wanted to do a quick project that I could get done and say I finished something, so I made a quick pincushion.
It's not meant to last, the pennant is just fabric-glued on, but it was quick and easy.
Am I the only one who adds things to do on their to-do list that they know they can get done right away simply for the satisfaction of crossing it off right away?

Sunday, March 20, 2011
Organization Time
This weekend I decided I needed to organize a little of my room in order to feel a little more calm.
One drawer went from this
then all dumped out like this
to this
with just one drawer organizer and a few smaller containers. Goodness it felt great.
One drawer went from this
then all dumped out like this
to this
with just one drawer organizer and a few smaller containers. Goodness it felt great.

Thursday, March 17, 2011
Totally Last Minute Tee
Last night my roomate and I were trying to find something green to wear, but neither of us could find anything good in our closets...until I discovered two white tees in a drawer, and decided to make us shirts.
Now, I know it's a little late for today, but you can use this method to make any sort of appliquéd shirt.
First, gather your supplies.
I found a clip-art online and a font I liked and printed them off to trace. (Hint: if you right-click your font, you can choose "outline" so you won't waste so much ink printing large letters)
Then I decided how much heat bond I'd need, and ironed it onto the fabric, paper-side up.
Trace your appliqué onto the heat bond with a pen or pencil. Don't forget to trace everything backwards!!
Cut it out.
Take the paper off the material and place it how you want it.
Iron on. I placed the iron on top for a few seconds so it wouldn't move around when I moved the iron.
Optional: Cut off the neck to make it off the shoulder 80s-ish. I totally just eyeballed the measurement.
Place paper or cardboard in between the shirt.
Go around the edge with fabric paint (this helps it stay on if you don't want to sew, or don't have time to sew it).
I'll have finished pictures of the roomie and I wearing them later today (:
EDIT::
Here are pictures of the finished shirts on St. Patrick's Day.
Linking up here:


Subscribe to:
Posts (Atom)